Tag Archives: Costume Design

MY Mr Knightley: Making a Shirt

For those of you making your Halloween (or Theater) Costume this fall, this tutorial on how to make a Regency Shirt is a great resource!

Tea in a Teacup

An 18th Century shirt, from the Victoria and Albert Museum. The sleeves are finely pleated to enable the tailcoat to fit over the top.

My first item of clothing in my husband’s Regency wardrobe is a white shirt.

Throughout the 18th century, men of all classes wore long white shirts with off-the-shoulder sleeves as a basic undergarment underneath their clothes. The shirts often doubled as nightwear and were usually made from linen or cotton. The only visible part of the shirt during the day was the upper edges of the collar peeking out from underneath the cravat, and maybe the frills on the cuff, which extended below the jacket sleeves in the 18th century. The tails of the shirt were also extremely long, designed to be pulled between the legs as an early type of underwear.

By Regency times, little had changed. The frills on the cuffs were beginning to…

View original post 1,351 more words

Millinery Projects – In Which I Make Lots Of Hats


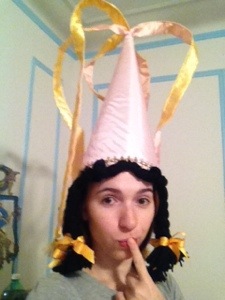
I’m currently in the middle of a project where I get to stretch some of my millinery skills by making a variety of fun hats. The project is re-creating a series of costume and prop pieces from photos to use in a new show. I have an image but I get to create the blue-print and puzzle it out myself. I’ll have some great tutorials for you guys after I’m done and the project is over, but for now here’s a little glimpse into the process.

20140129-140452.jpg


20140129-140514.jpg

20140129-140539.jpg

20140129-140554.jpg

20140129-140608.jpg

20140129-140639.jpg

Valentino Costumes for the New York City Ballet

Yesterday I posted about how fashion can inspire costume design. It seems that the reverse can be true as well. Valentino has been working with the New York City Ballet on some new designs for their Fall Gala (Which takes place tonight).

Mr. Valentino at work in the NYCB Costume shop alongside his longtime business partner Giancarlo Giammetti and NYCB Director of Costumes Marc Happel. Photo provided by NYCB.

As many know Mr. Valentino has retired from the fashion industry but apparently he was not done creating his beautiful feminine silhouettes. In an article from the Huffington Post Valentino is quoted as saying “I stopped because in the `fashion world,’ I had done almost everything, and fashion was taking a direction I didn’t like, … This is a new life for me, and it’s been a very beautiful experience.”

For those of us that can’t make the Gala tonight the NYCB has been kind enough to share some photos of his work. You can also follow the events via the NYCB twitter feed. Enjoy!

A close-up look at a bodice. All sewn by hand! Photo by NYCB
Warm Ups in Rehearsal Skirts. Photo by the NYCB.


Detailing on a Valentino Costume. Photo by NYCB
Principal Dancer Janie Taylor in her Valentino Gown. Photo by NYCB.
Principal Dancer Wendy Whelan in her Valentino Gown. Photo by NYCB


1930’s Costumes and the New York Public Library

This past week I have been working on two new design projects. The first is a set design for a play called HA! (I will be posting on that later in the week), the second is a costume design for a production called “The President” which is set in the late 1930’s in New York. I love doing vintage costume research and the New York Public Library has an amazing collection of original Fashion Sketches.

My Research has me focused on work and day-wear for men and women made between 1937 and 1939 and the NYPL Digital Gallery is an amazing resource of both sketches and photos from the period. Below is some of my research. For those of you not in NYC the Digital Gallery collection  of more than 800,000 images can be accessed for free. Just click the link here!


Halloween Makeup Inspiration

With the Halloween weekend upon us I decided to take some time away from my “Stag” drafting and do a post on makeup design. In college the Theater Makeup design class was one of my favorites. Unlike normal cosmetology which strives to make someone look pretty, theater makeup strives to make an actor look a different age, species (if you are in Cats), or just like someone else all together. Here is a quick round-up of some of my favorite transformative looks for Halloween that you can do with a basic Halloween makeup kit and some of your own makeup products:

Black Swan Makeup:

Image and Directions Provided by Bellasugar.com

Directions for how to do Black Swan Makeup by Designer Judy Chin:

  • Face: First, the makeup artists applied a pale ivory foundation, using a white cream highlight on the forehead and cheekbones.
  • Eyes: MAC’s Chromaline in Black Black ($17) was used to outline the eyes. Then, a silver shade from the brand’s Pigment ($20) line was combined with Mixing Medium and applied over the eyes in feather-like strokes. For even more drama, the under-eyes were lined withChromaline in Red ($17).
  • LipsVino lip pencil ($13) was used as a base, followed by Dubonnet lipstick ($16).
Corpse Bride Makeup: 
 
Corpse Bride photo from fveda.com

What you need: Black Lipstick, Black liquid eyeliner, fake eyelashes, white cream foundation, blush colored eyeshadow

  • Face: Apply white base over entire face, eyelids and eyebrows, don’t forget under the nose
  • Eyes: Apply fake eyelashes. Add blush colored eyeshadow over the eye that you intend to draw on. Using black liquid eyeliner create the branches of the plant. Starting at the inner upper and lower corners of your eye (make sure for the lower side the branch extends at an angle towards the outer side of your cheekbones. Add spikes and flowers once you have the number of branches that you want.
  • Lips: Using the black lipstick fill in your lips so that they are completely black and you are done.

Spiderwoman  Makeup:

Image Provided by eyesandlips.com 

What you need: Fake eyelashes, Black liquid eyeliner, foundation, charcoal  gray, and white eyeshadow, eyebrow pencil, body jewels, your favorite lipstick, clear finishing powder.

  • Face: Apply foundation all over face including brows, eyes and lips (this helps the makeup last longer). Draw in brows with eyebrow pencil. Apply lipstick
  • Eyes: Apply fake eyelashes to top and bottom lids. Use the black liquid eyeliner to create a thick line on the upper and lower lids around the eye. Add charcoal gray shadow to the upper lid and at the outer corner of the under eye area. Apply white eyeshadow to the inner corner of the eyes.
  • Spider web: Starting with the inner corner of the eye create vertical (squiggly) lines down from your lower lashes. Continue along the bottom as your eye line starts to turn up at the outer corners. Repeat lines on top lid. At the outer corners of your eye make 3-5 angled lines (on top and bottom) and one horizontal line that comes out of the corner of your eye. Connect all these lines with “swoopy” lines. Take 3-5 body jewels and apply where the lines intersect. Use finishing powder to set.
Image Provided by ooglemakeup.blogspot.com

What you need: White cream foundation, red lipstick, black eyeliner, black cream makeup, regular liquid foundation one shade darker than your normal color, blush, finishing powder.

  • Face: Using a sponge and the white cream foundation create a heart shape outline on your face starting from in between your eyebrows and working out using the natural curves of your face – the point of the heart should be in the middle of your chin. Fill in the heart with the white foundation. Using a brush outline the heart in the regular color foundation. Sweep blush across your cheekbones starting from inside the heart shape and working out. On the right  cheek use the black eyeliner to create a tiny heart that lines up with the outer corner of your eye. Finish off with powder.
  • Eyes: Using liquid eyeliner create a thick line across the top of your lid. Using the black cream makeup and a brush paint on thick black eyebrows (use the shape of the heart to help create the shape of they brows).
  • Lips: Last but not least, apply red lipstick to your lips – make sure to accentuate the heart shape of your lips and feel free to draw outside the lines.


Cinema Italiano

“Style is the New Content…” – Kate Hudson, Nine
Image taken from Youtube screenshot

This past weekend, while my man and I were trapped inside (thanks Irene), I did some catching up on films I have been wanting to see. Nine, the star studded musical directed by Rob Marshall was top of that list and I loved it. While I felt that there were some parts that could have been fleshed out more, and characters that needed to be re-addressed; the costumes, sets and cinematography were to die for.

Image taken from a Youtube screenshot

Kate Hudson rocked Cinema Italiano (see the youtube clip below) in white go-go boots surrounded by skiny-tie clad gents and had me wishing that I was living in an Italian movie.

From a design standpoint, the intermarriage of 60’s Mod costumes, Renaissance Italian sculpture and modern platforms that were sleek enough to be on any “Project Runway” set was extremely interesting. The three styles are hard enough to pull off on their own, so I had to go back and watch Cinema Italiano a few times before I figured out why I felt it all fit together so well (aside from the fact that it’s a fantasy scene).

The alternation between black and white (which plays well against the costumes) and color shots (which highlight the modern set) allows for the song to feel like it could belong in both worlds; And Kate Herself while costumed like a 60’s model and dancing like she belongs at a Beatles concert still screams ‘modern women’ in the way she carries herself. While this doesn’t help in the more ‘real world’ scenes for this number it lends itself beautifully to the dance sequence. But don’t take my word for it. Watch the movie yourself and see what you think.

Kate Hudson